4. Features
4.1 Externals with User Account
A user account is required on the share in order to use these features.
Users can only be selected as recipients once they have logged in to the share for the first time.
4.1.1 General Overview
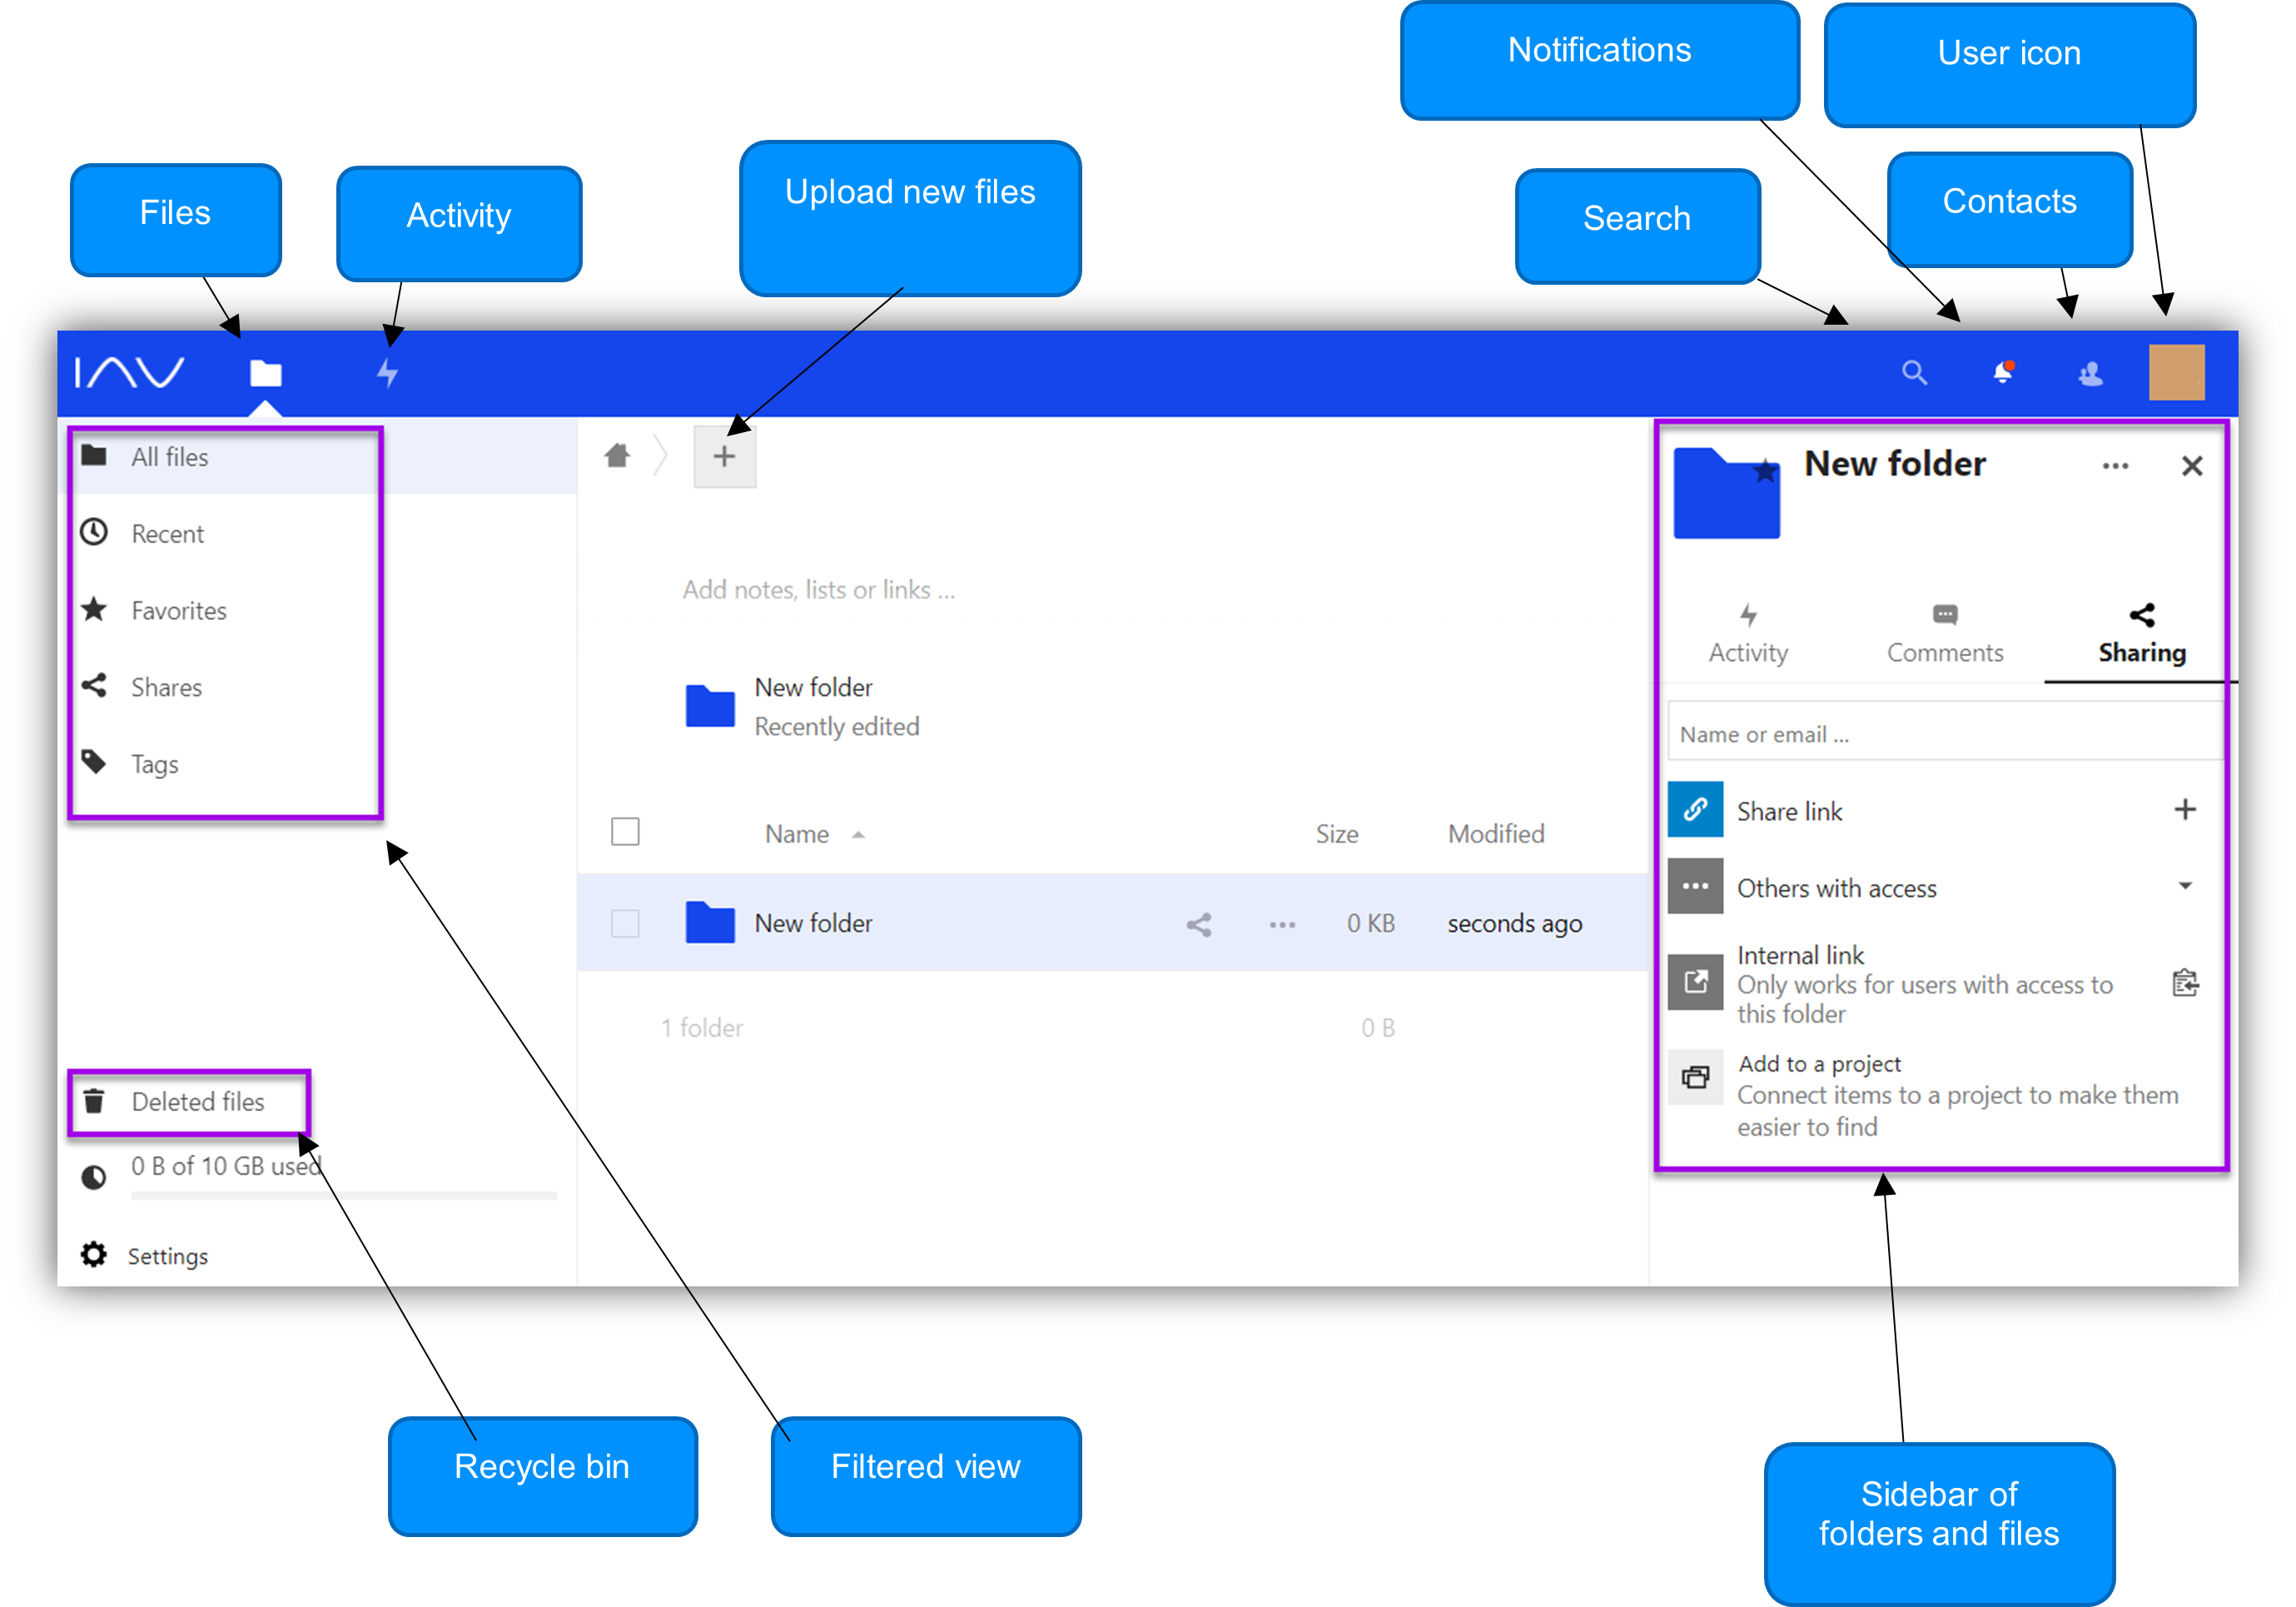
A brief overIVew of the most important sections of the Sharing Platform are shown below:
4.1.2 Create New Folder
In the upper section of the home page you can find the home icon which shows the top level of the directory structure in the home area. Next to it the plus icon offers the following choices:
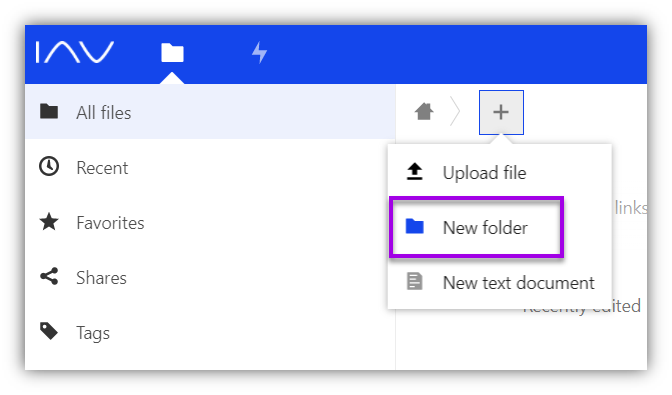
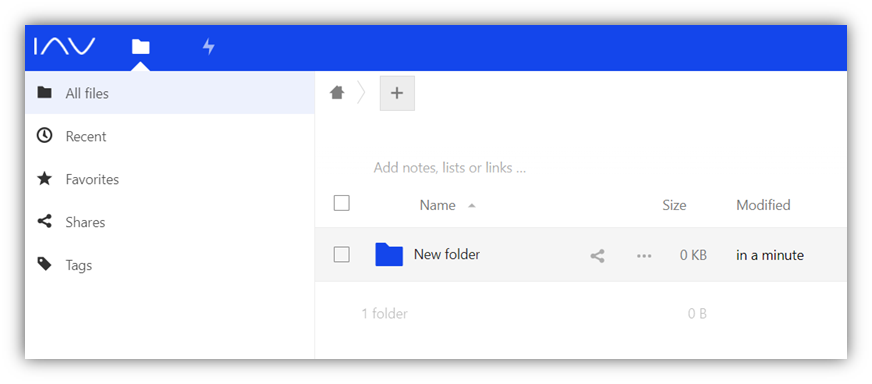
Select “New folder” and enter a name for the new folder. Press Enter key or click on the arrow so that the folder is created.
4.1.3 Upload File
Change to the destination folder where the upload is to be stored, click on the plus icon and select “Upload file”. Now choose a file to upload.
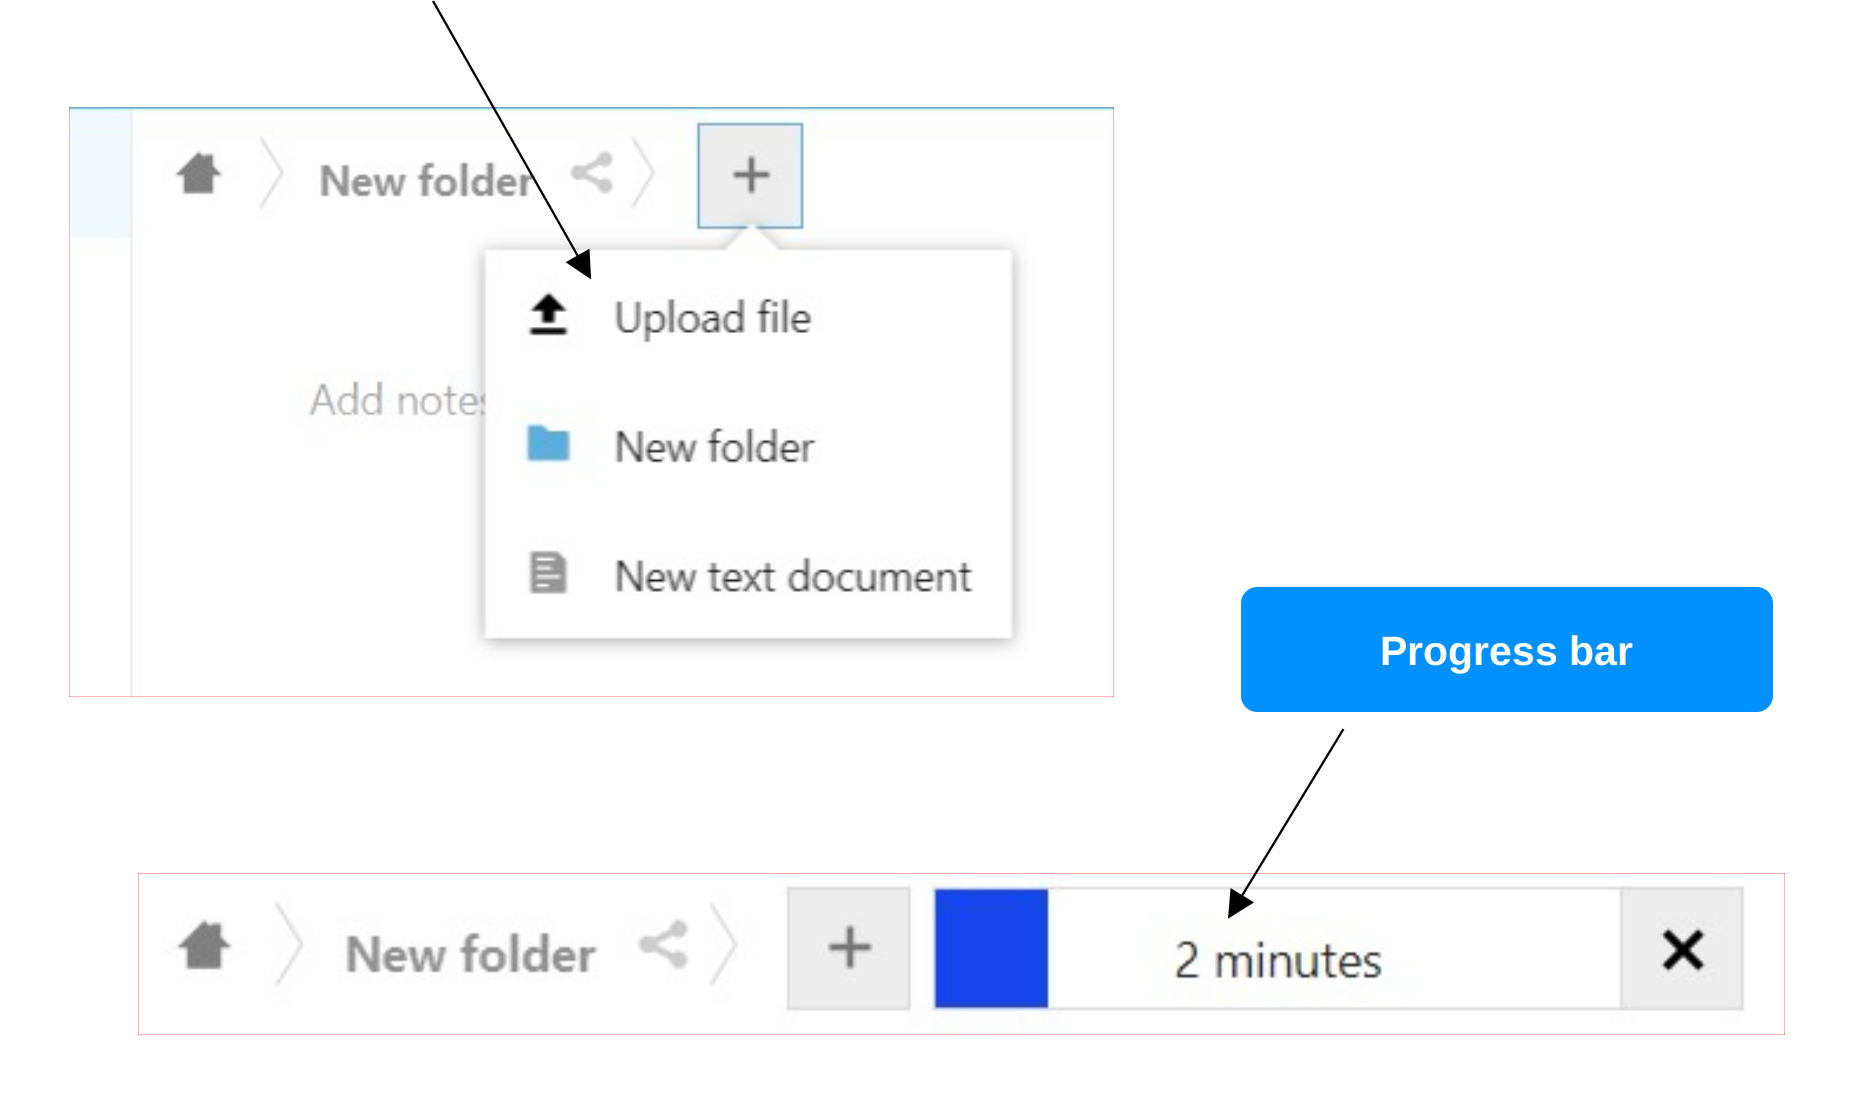
Important!
The uploaded files will be deleted automatically after 30 days.
Tip
For files that are several GB in size, uploading via the Nextcloud app is recommended. In case of interrupted transfers in the browser window, the upload would have to be restarted from the beginning, while the Nextcloud app is able to continue at the interrupted point.
4.1.4 Share File
In order to be able to share an uploaded file navigate to file's location and click on the share icon. A new context menu opens on the right side.\
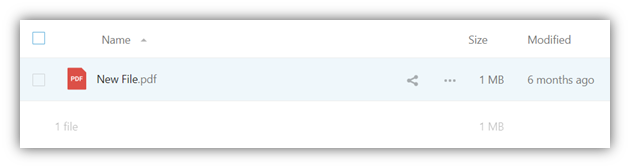
Next to the "Activity" and the "Comment" section select the "Sharing" section.
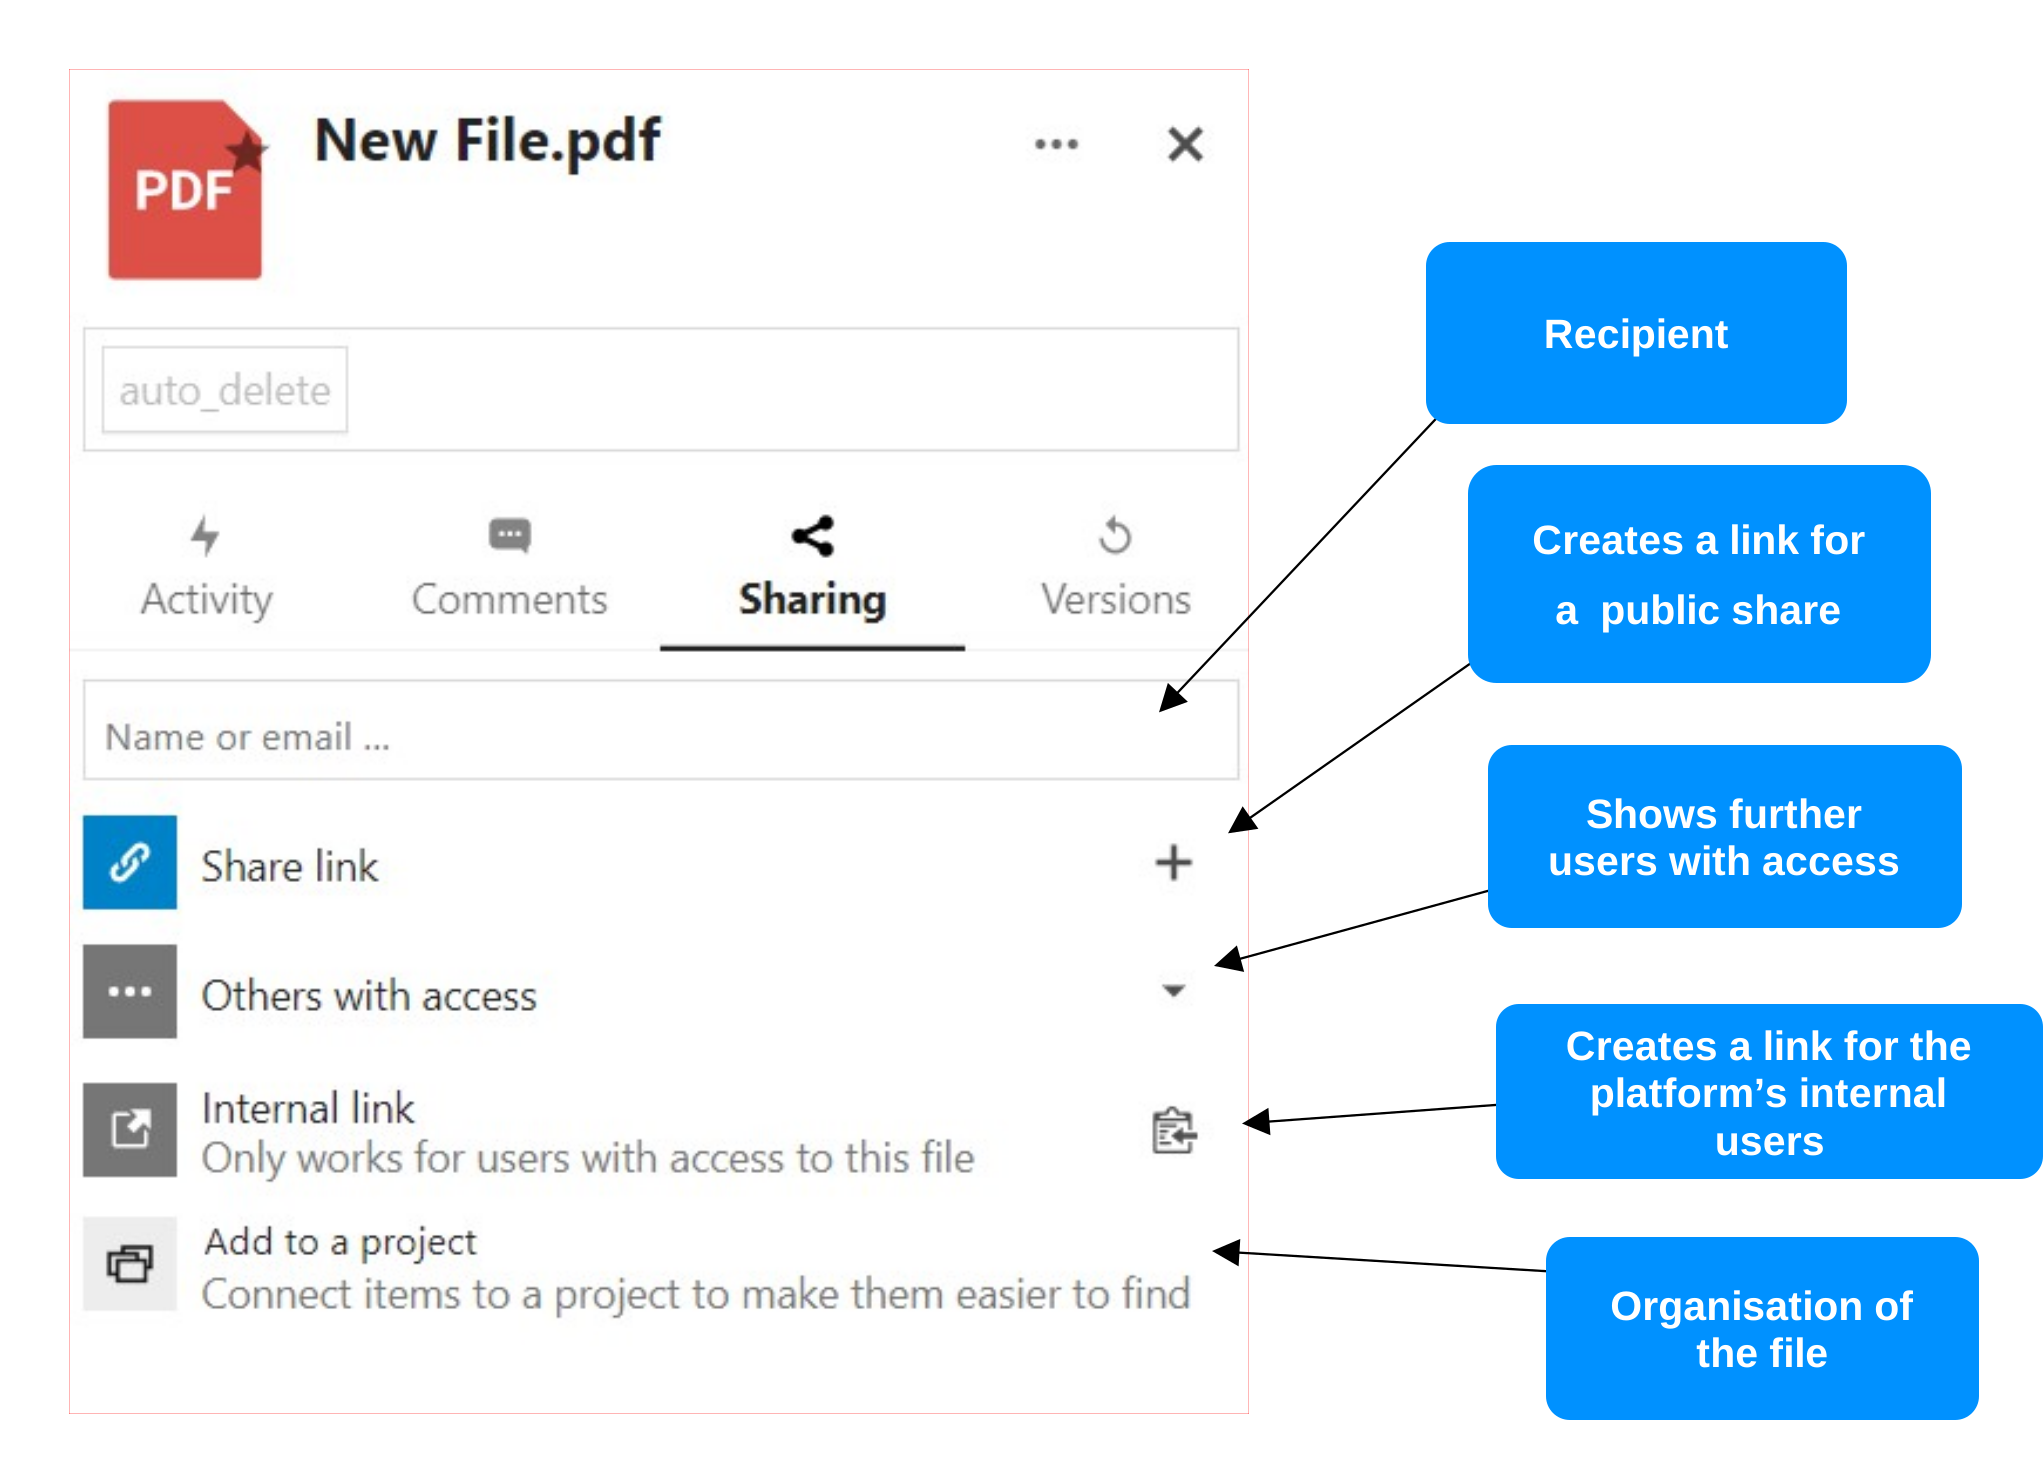
In the text field containing "Name or email" the internal and/or external recipient are given.
Important!
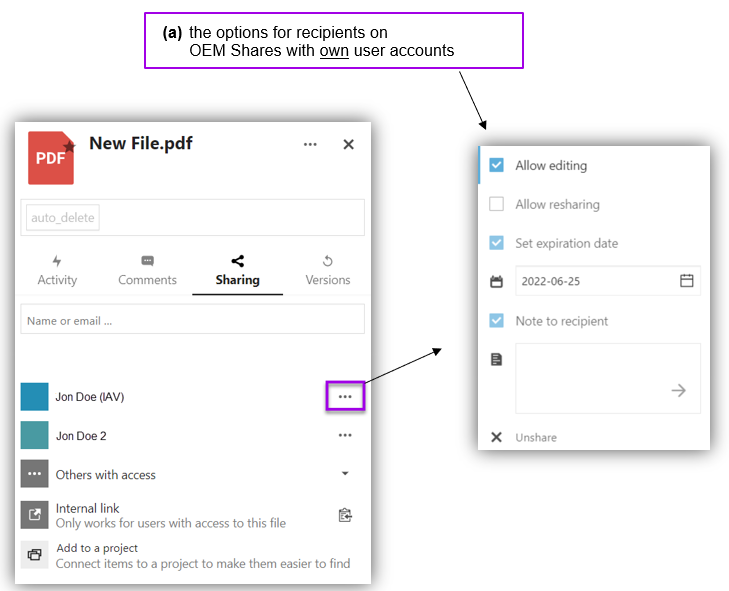
Valid for all OEM Shares: If sharing is intended for internal/external persons who have their own user account, no separate password is to be assigned. Each recipient sees the data shared with them after they log into their own user account.
Valid for IAV Share only: For external persons who do not have their own user account, the system automatically generates a password which IAV employees receive by email to their own mailbox. It is the IAV colleague responsibilty to forward the password to the recipient. Ideally, this should be done on a separate channel. Finally, the external recipient receives an email containing a link to a designated page on the IAV Share which prompts the external person to enter the previously provided password.
Caution!
Valid for all Shares: For strictly confidential data, an additional encryption is necessary.
Further sharing options can be selected. This way, selective rights for editing or sharing can be set individually for each recipient.
Data Classification: Strictly Confidential
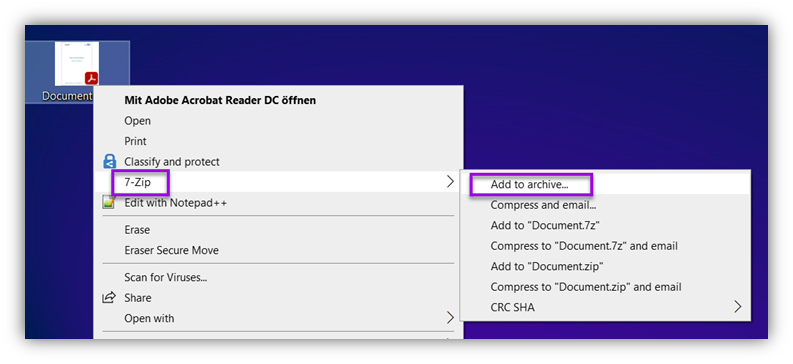
If the file to be shared is a file classified as strictly confidential, it must be additionally encrypted in advance. In the following example, the 7-Zip tool is used for this process.
First right-click on the desired file, select the item "7-Zip" and "Add to archive".
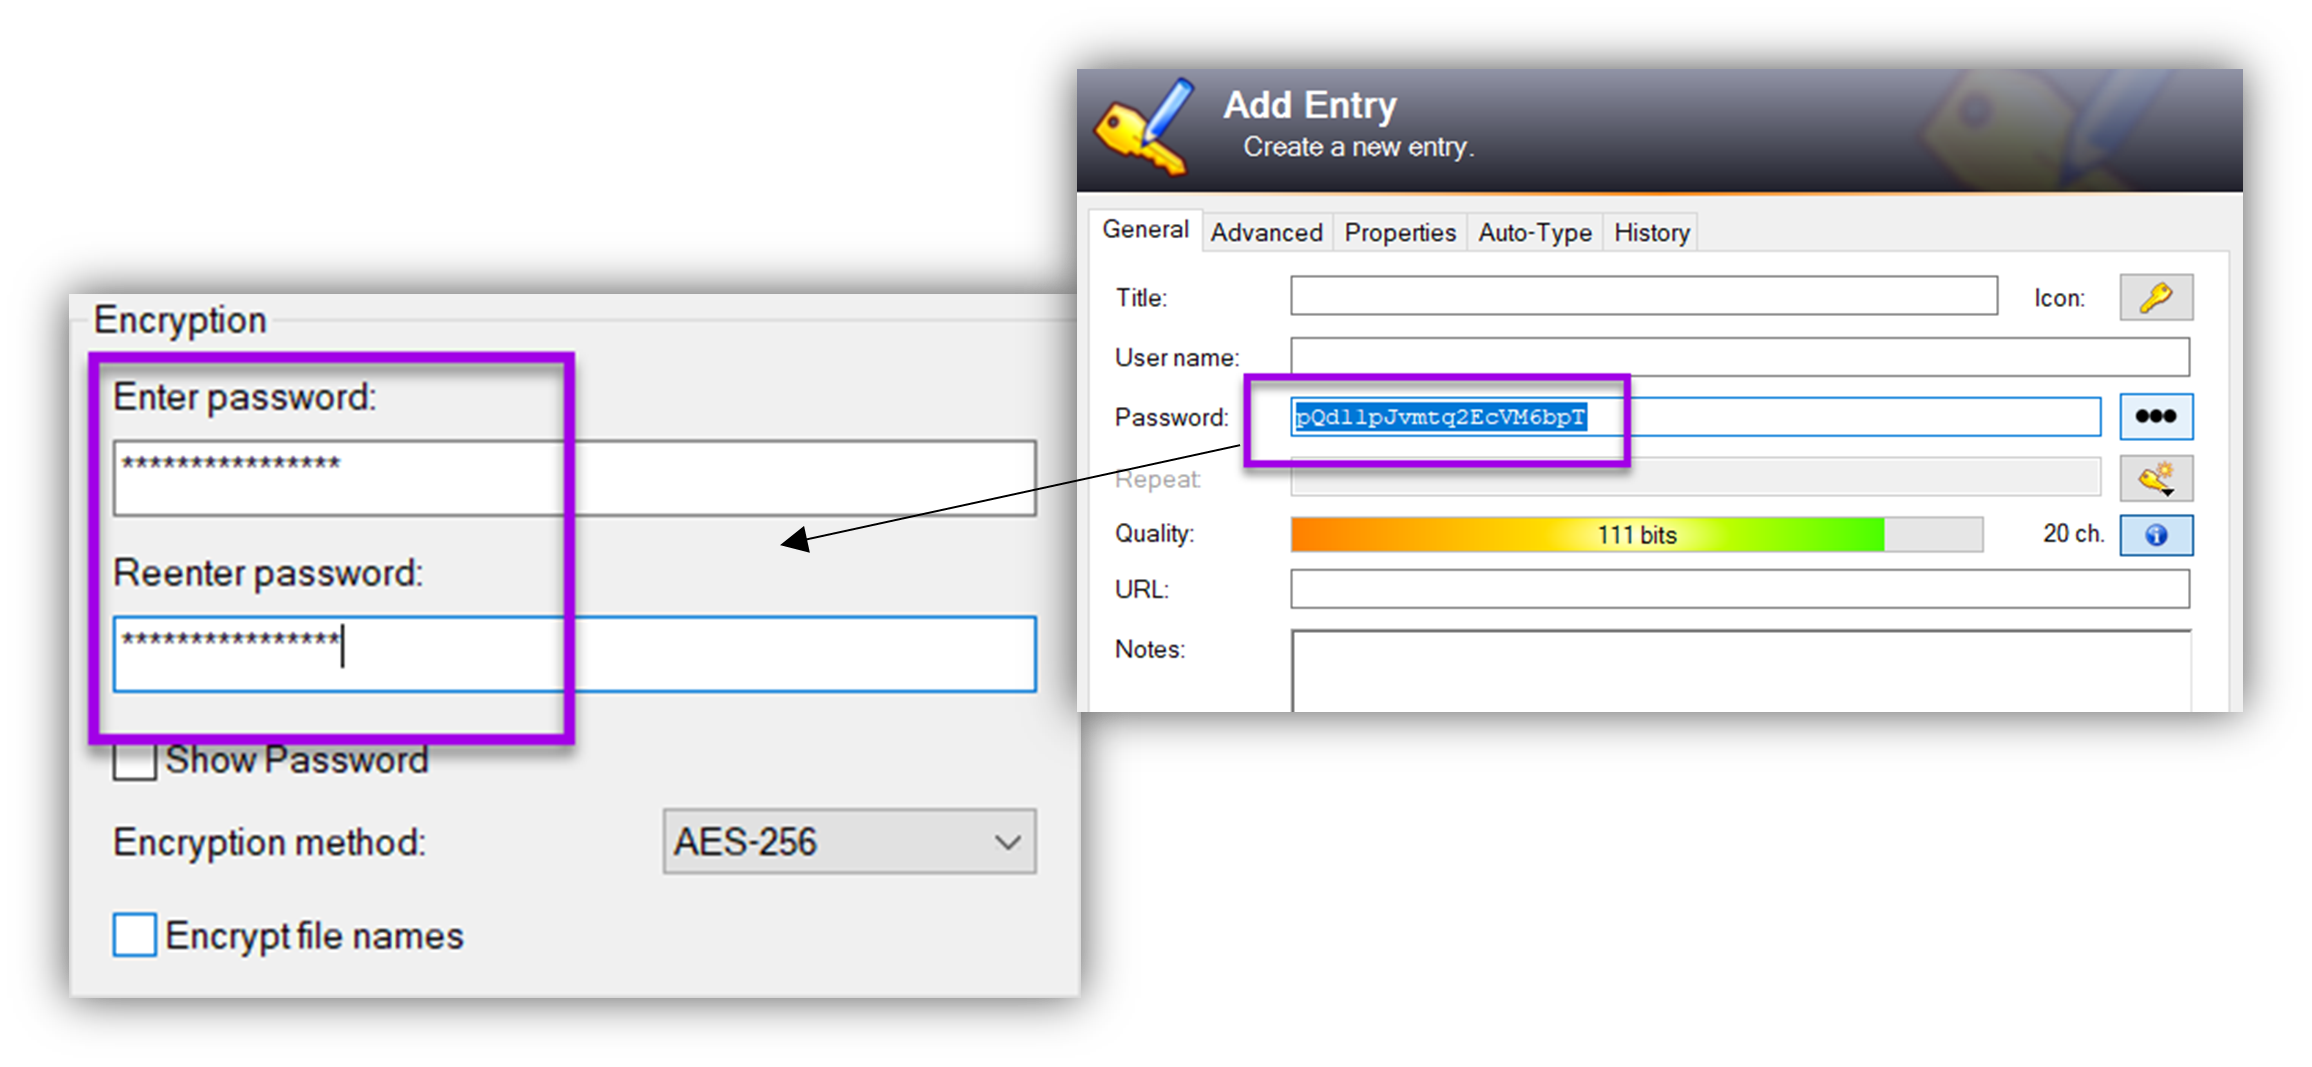
In the following window, among other things, the password is assigned, which is defined on the basis of the IAV Password Policy.
TIP
The tool KeyPass not only offers a handy way to generate passwords but also to store them easily.
4.1.5 IAV Password Policy
The password must not contain user names or full (account) names.
- Minimum password length: 20 characters
- Capital letters from A to Z
- Lowercase letters from A to Z
- Digits of base 10 (0 to 9)
- Other than alphabetical characters (e.g.: !, $, #, %, etc.)
- The use of country-specific characters (ü, ä, é, á) is not recommended.
4.1.6 Share Folder
Instead of sharing files indiIVdually, it is also possible to set up sharing for a folder including subfolders and files. The procedure follows the same schema described above for sharing a file.
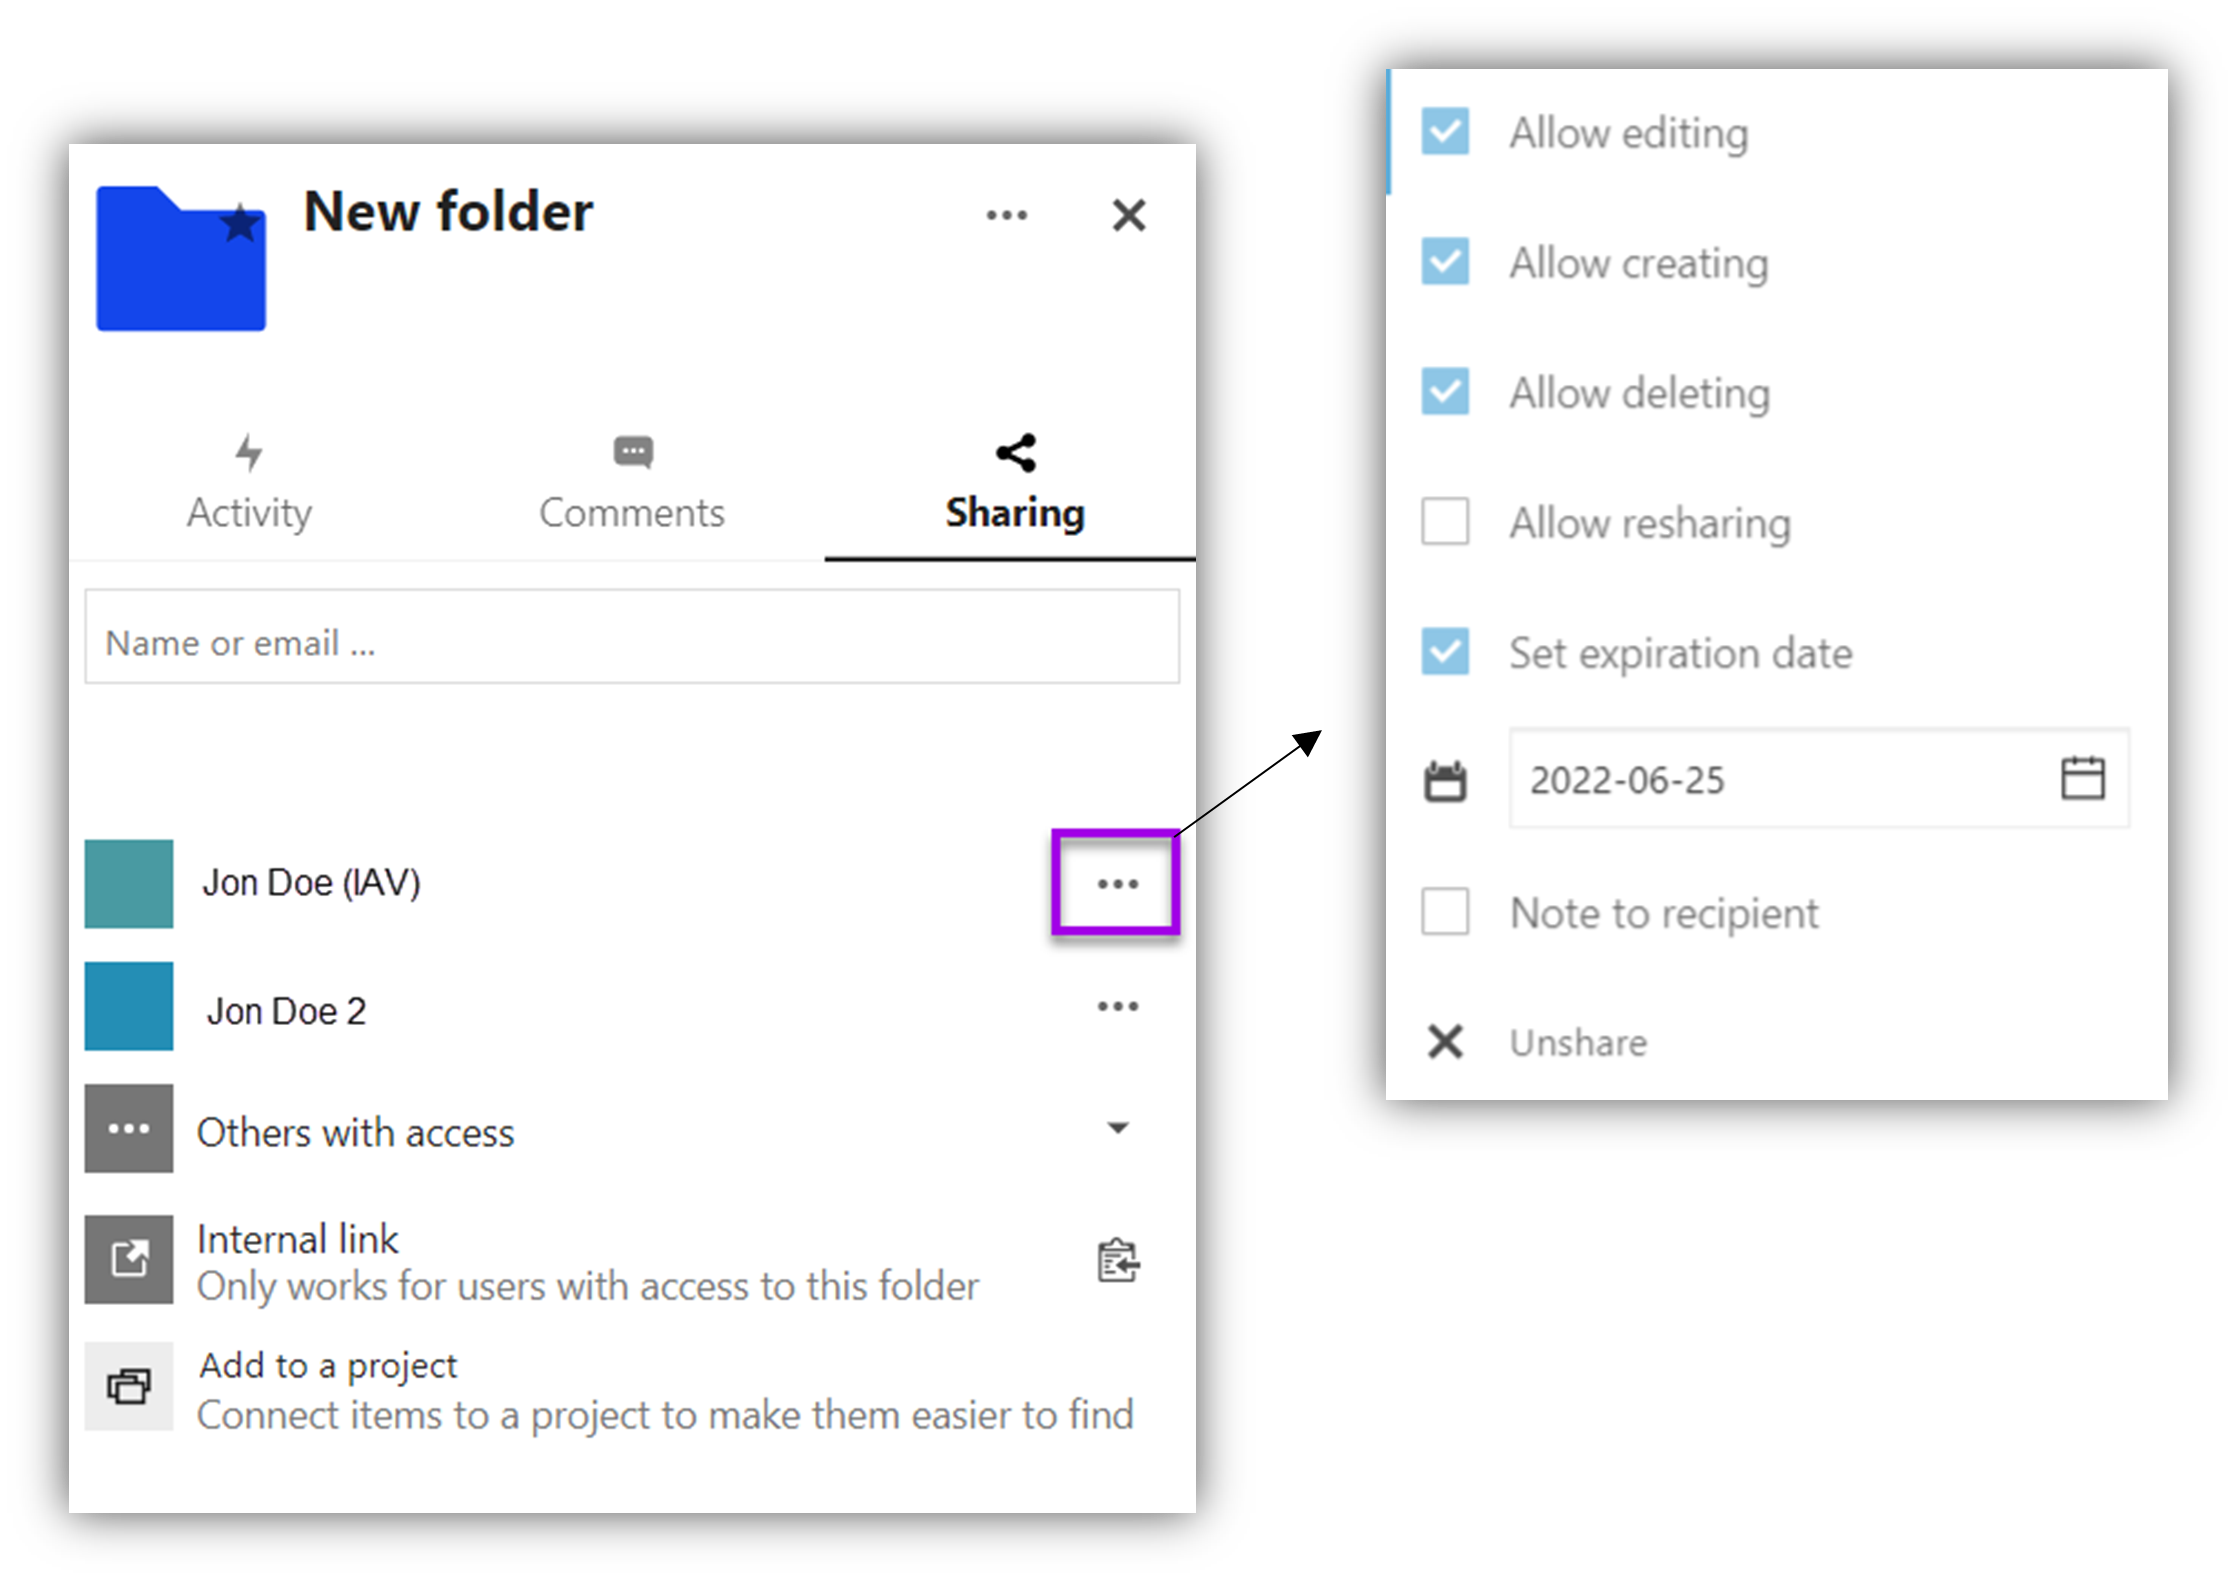
The expiration date of a folder or share is automatically limited by the system to 365 days. A new expiration date within 365 days can be defined manually at any time.
Folders whose content is automatically deleted after 30 days will remain after this period.
Likewise, the created share on a folder (max. 365 days) does not expire.
4.1.7 Receive Files
If a recipient has been granted the right to upload files, files can also be received.
To do this, either “Allow upload and editing” or “File drop (upload only)” must be enabled.
Important!
The sharing platform is not a place for permanent data storage. New data must be backed up promptly after receipt.
4.1.8 Delete Share
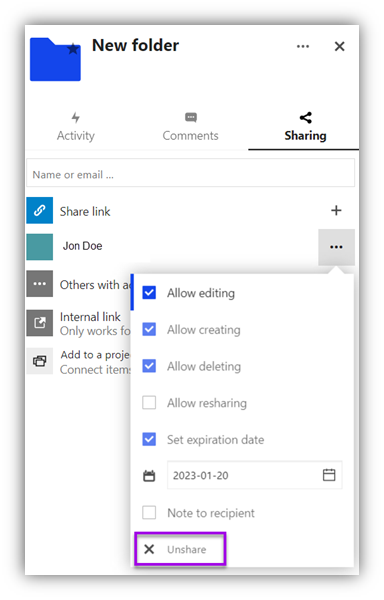
It is possible to remove a granted share at any time. You can stop sharing in the options of a file or folder.
4.1.9 Delete Files/Folders
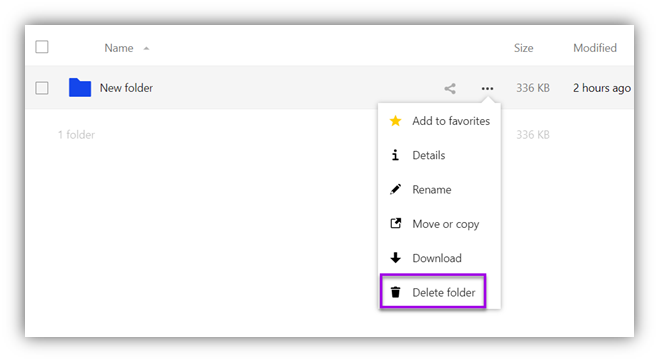
Folders or files can be deleted under properties by selecting "Delete folder"/"Delete file" which moves the objects to the trash bin.
4.1.10 Recover Deleted Files
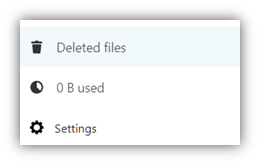
All folders/files that have been deleted are located in the trash bin, which is located at the bottom left of the display window.
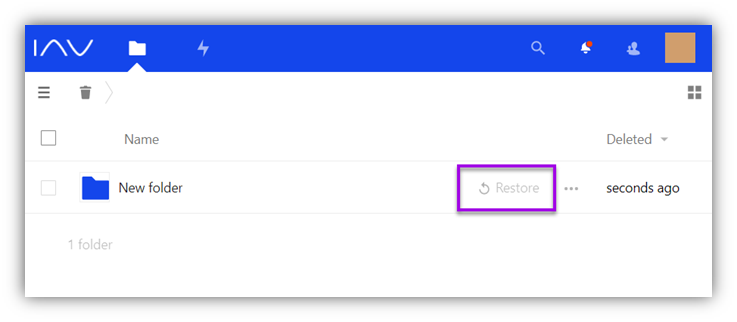
Files can be easily restored by pressing the "Restore" button and are returned to their original location, including versioning.
The trash bin is cleaned up automatically after 30 days. Manual deletion of the data is possible at any time.
However, if files in the trash bin reach 50% of the user's quota, the oldest files in the trash bin are automatically deleted.
4.1.11 Versioning
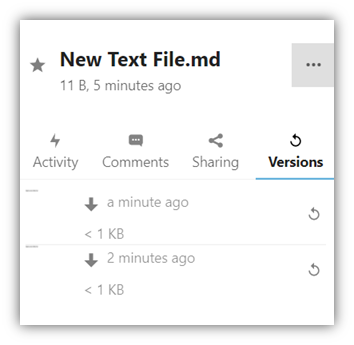
Versioning of files is available with Sharing Platform. Changes to files are logged and you can restore previous versions with just a few clicks. To do this, click on the options and select "Details", which opens the sidebar.
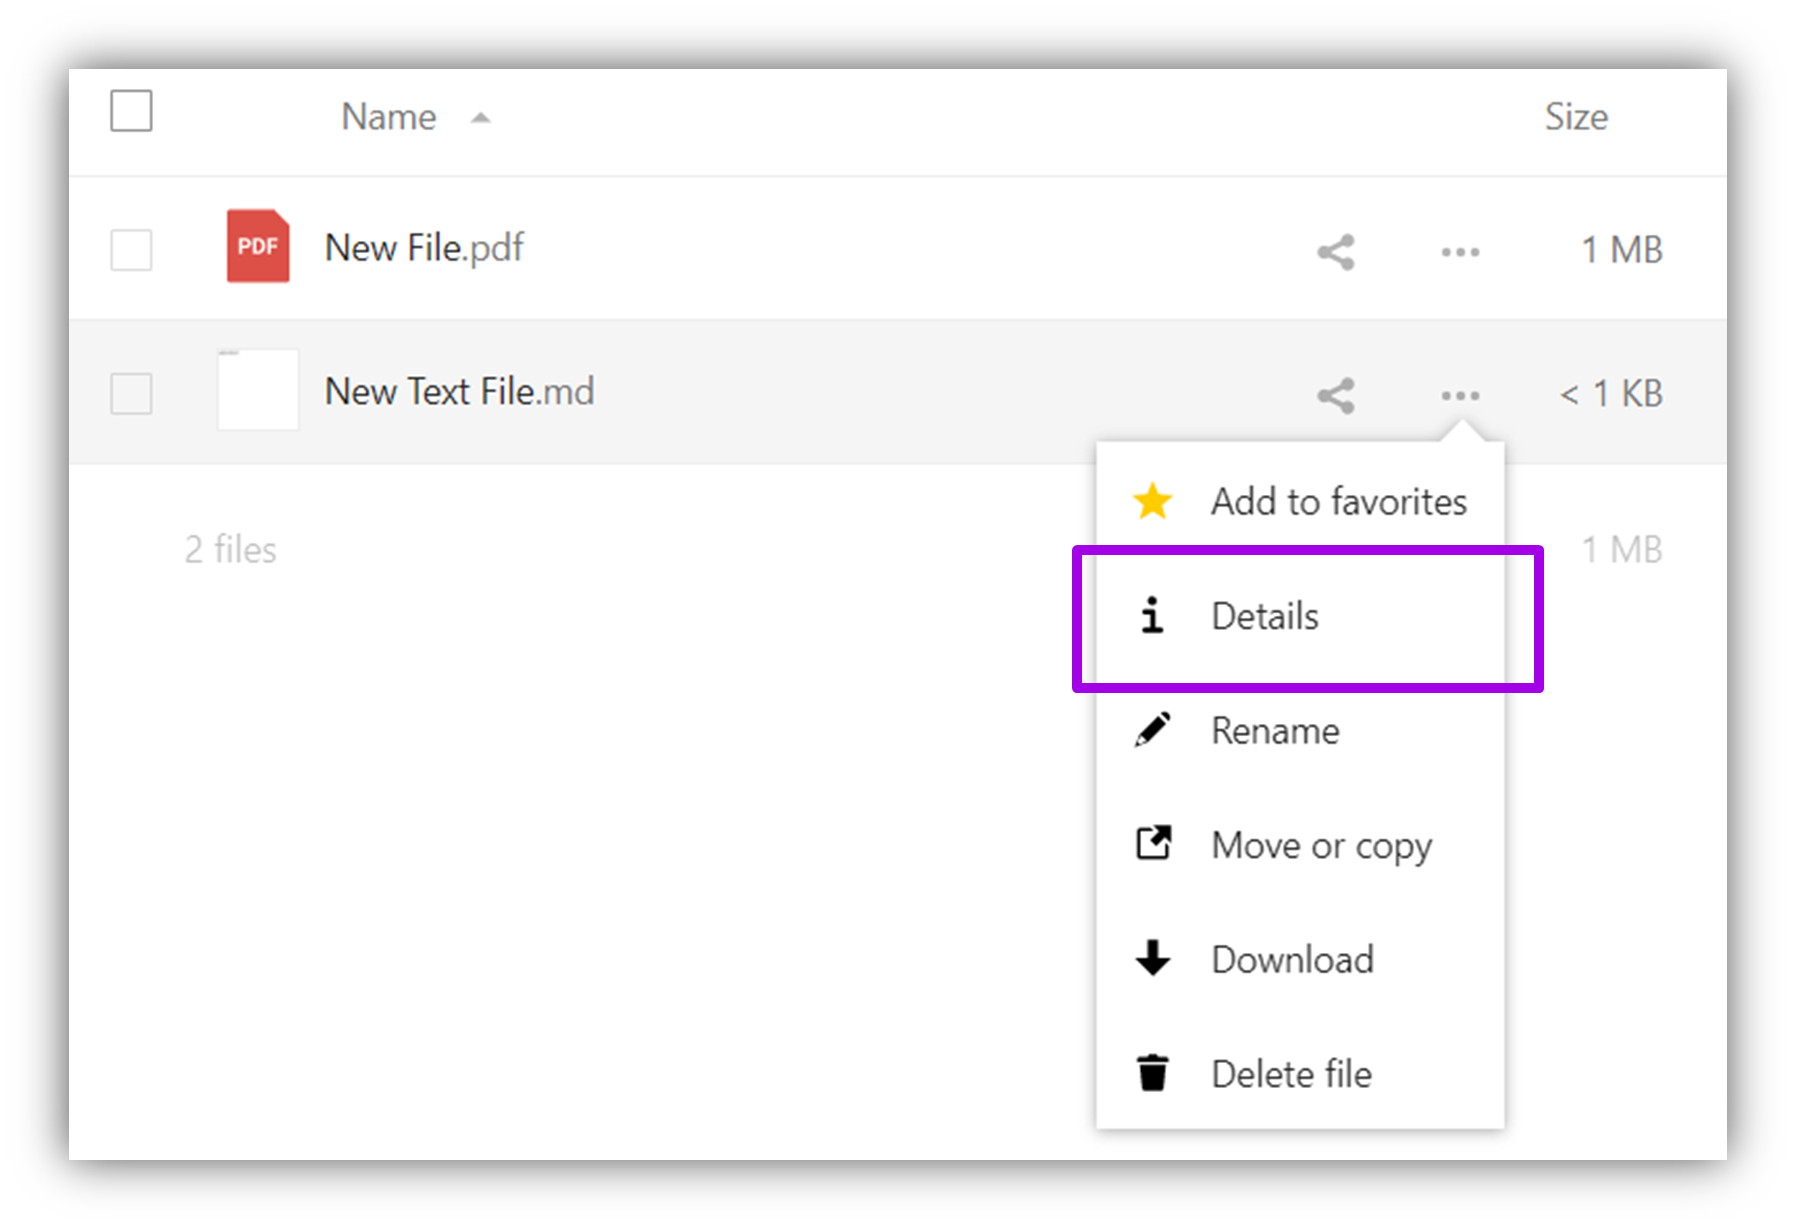
On the right side there is the button "Versions". Here previous versions can be restored.
4.2 Externals without user account
4.2.1 Receive Data
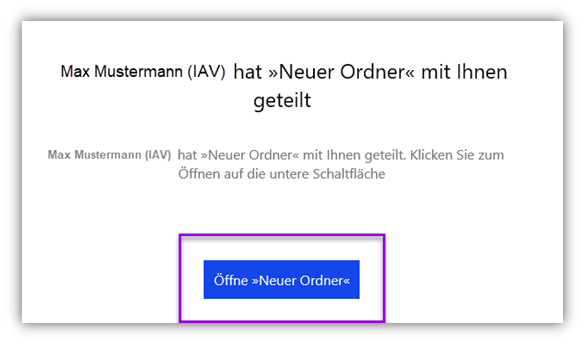
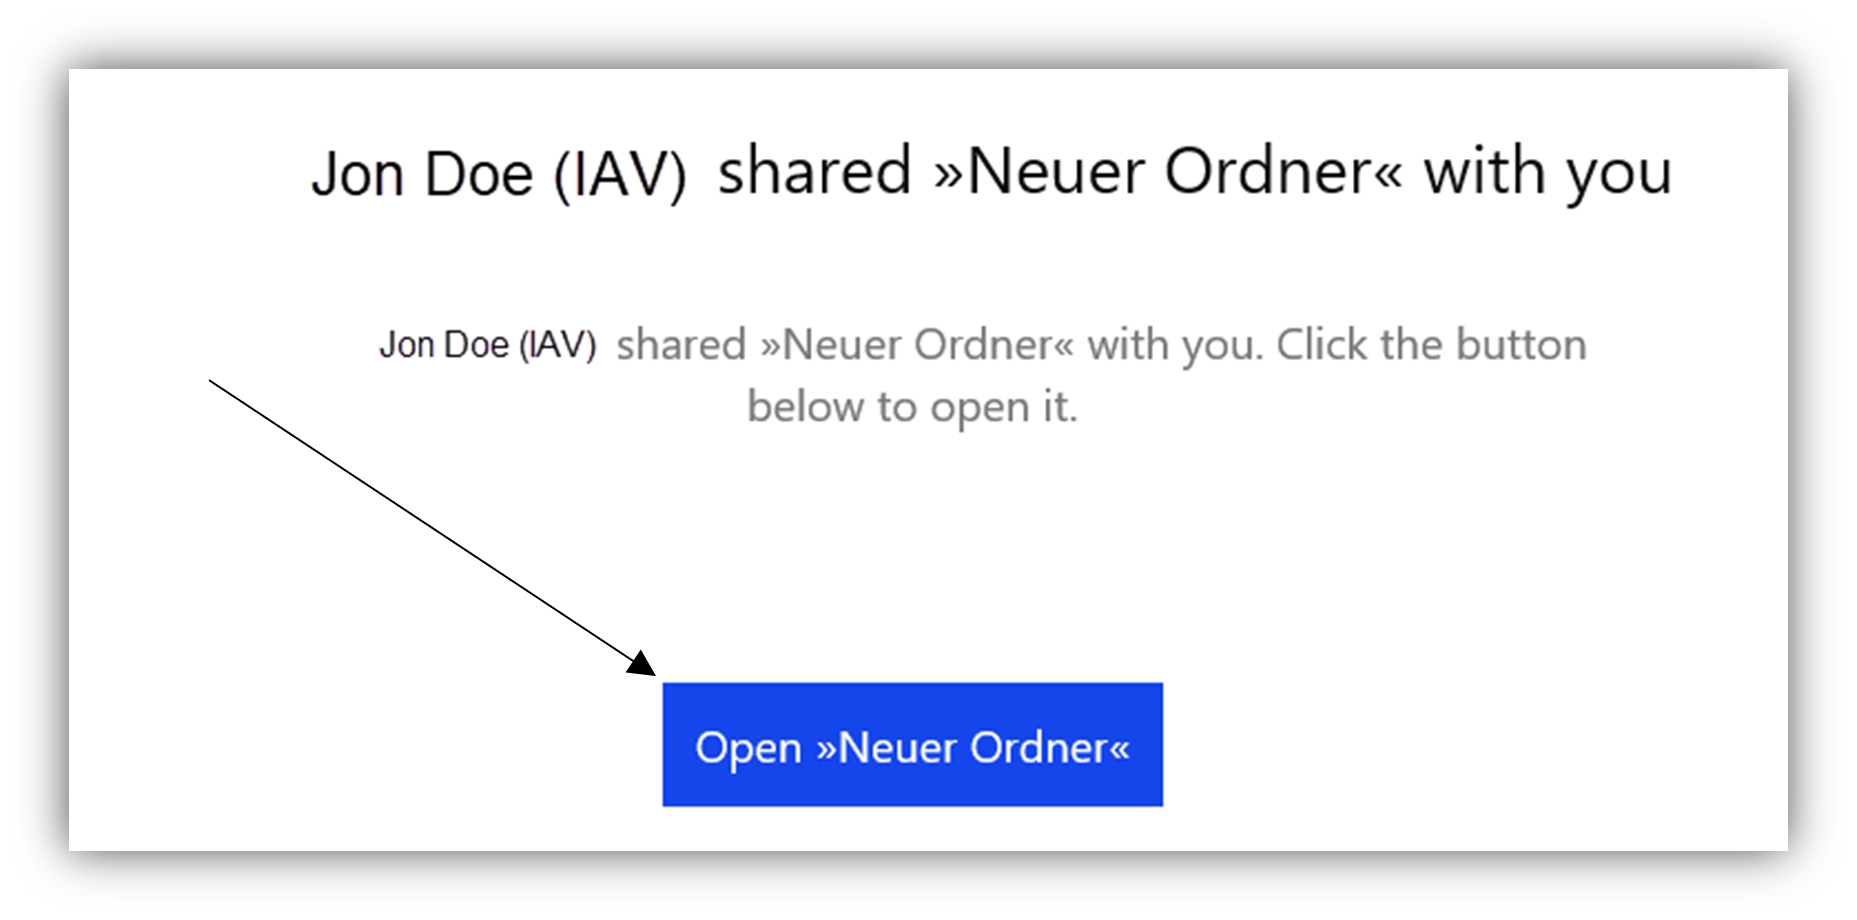
With the receipt of an email, information about available data as well as the corresponding link is provided.
Open the link
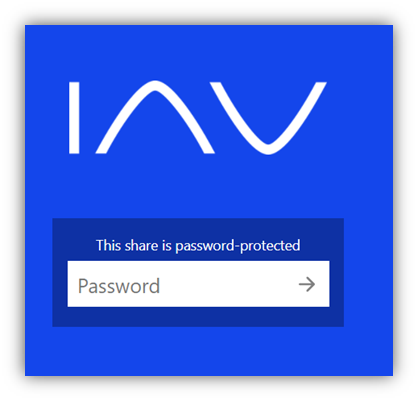
Enter the password that has been set separately by the IAV contact person.
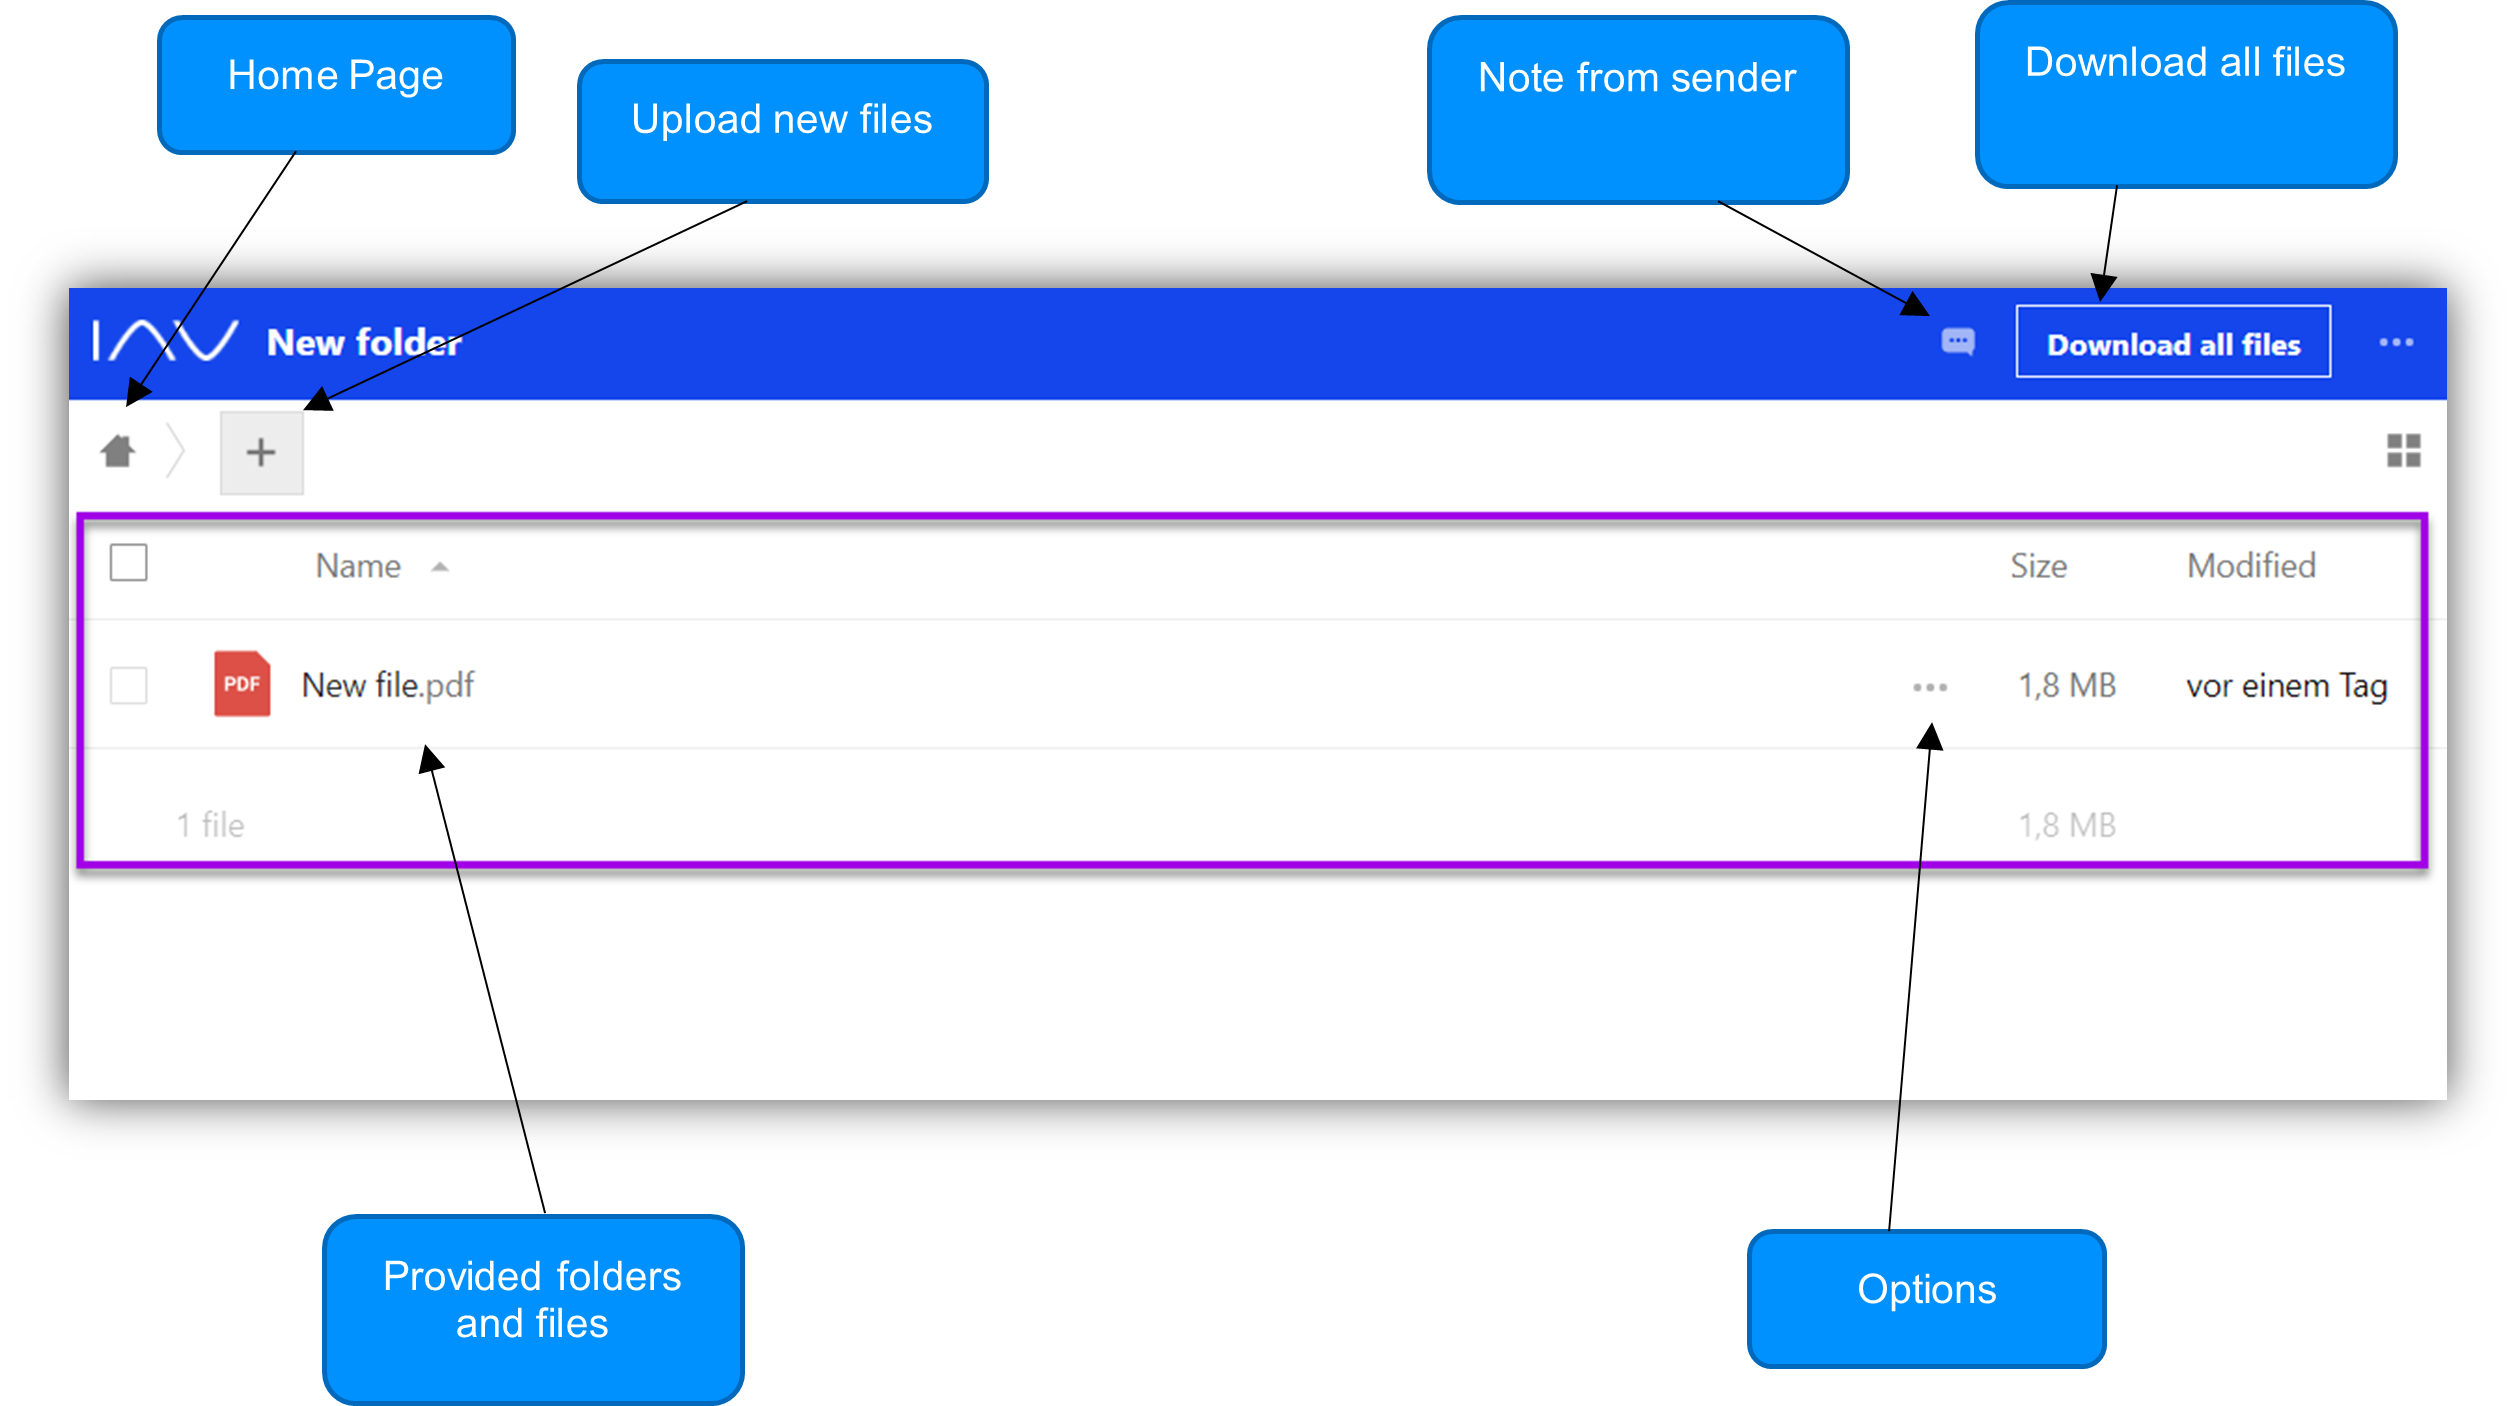
4.2.2 General Overview
A brief overview of the most important sections:
4.2.3 Download Data
If there are write permissions, there are two options available for this:
- Download file selectively by clicking on the icon "..." and click on "download".
- Click on "Download all files" and the Sharing Platform puts all data into a ZIP archive and starts the download.
4.2.4 Upload Data
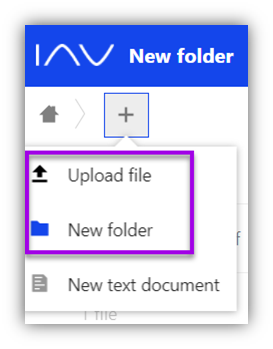
If write permissions are given, click on plus icon and select "Upload file" or create a folder first and select "New folder".
4.2.5 Delete Folder/Files
If write permissions are given, data can be deleted selectively by clicking on "..." and selecting "delete".
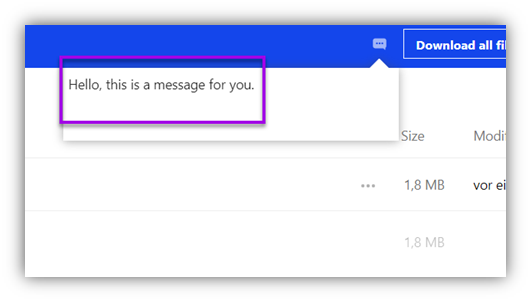
4.2.6 Note from sender
If the sender has left a note, a separate e-mail will be sent. The note will be displayed on the Sharing Platform, too.